From Prompt to Print: Creating Custom 3D-Printable Objects with Gemini, AI Reconstruction, and Bambu Studio


Generative AI has reached a point where you can go from a simple idea to a fully printable 3D object with surprisingly little manual modeling. This post walks through my end-to-end workflow for creating custom, 3D-printable objects starting from a text prompt, using a mix of generative AI, 3D reconstruction, mesh cleanup, and traditional CAD tooling.
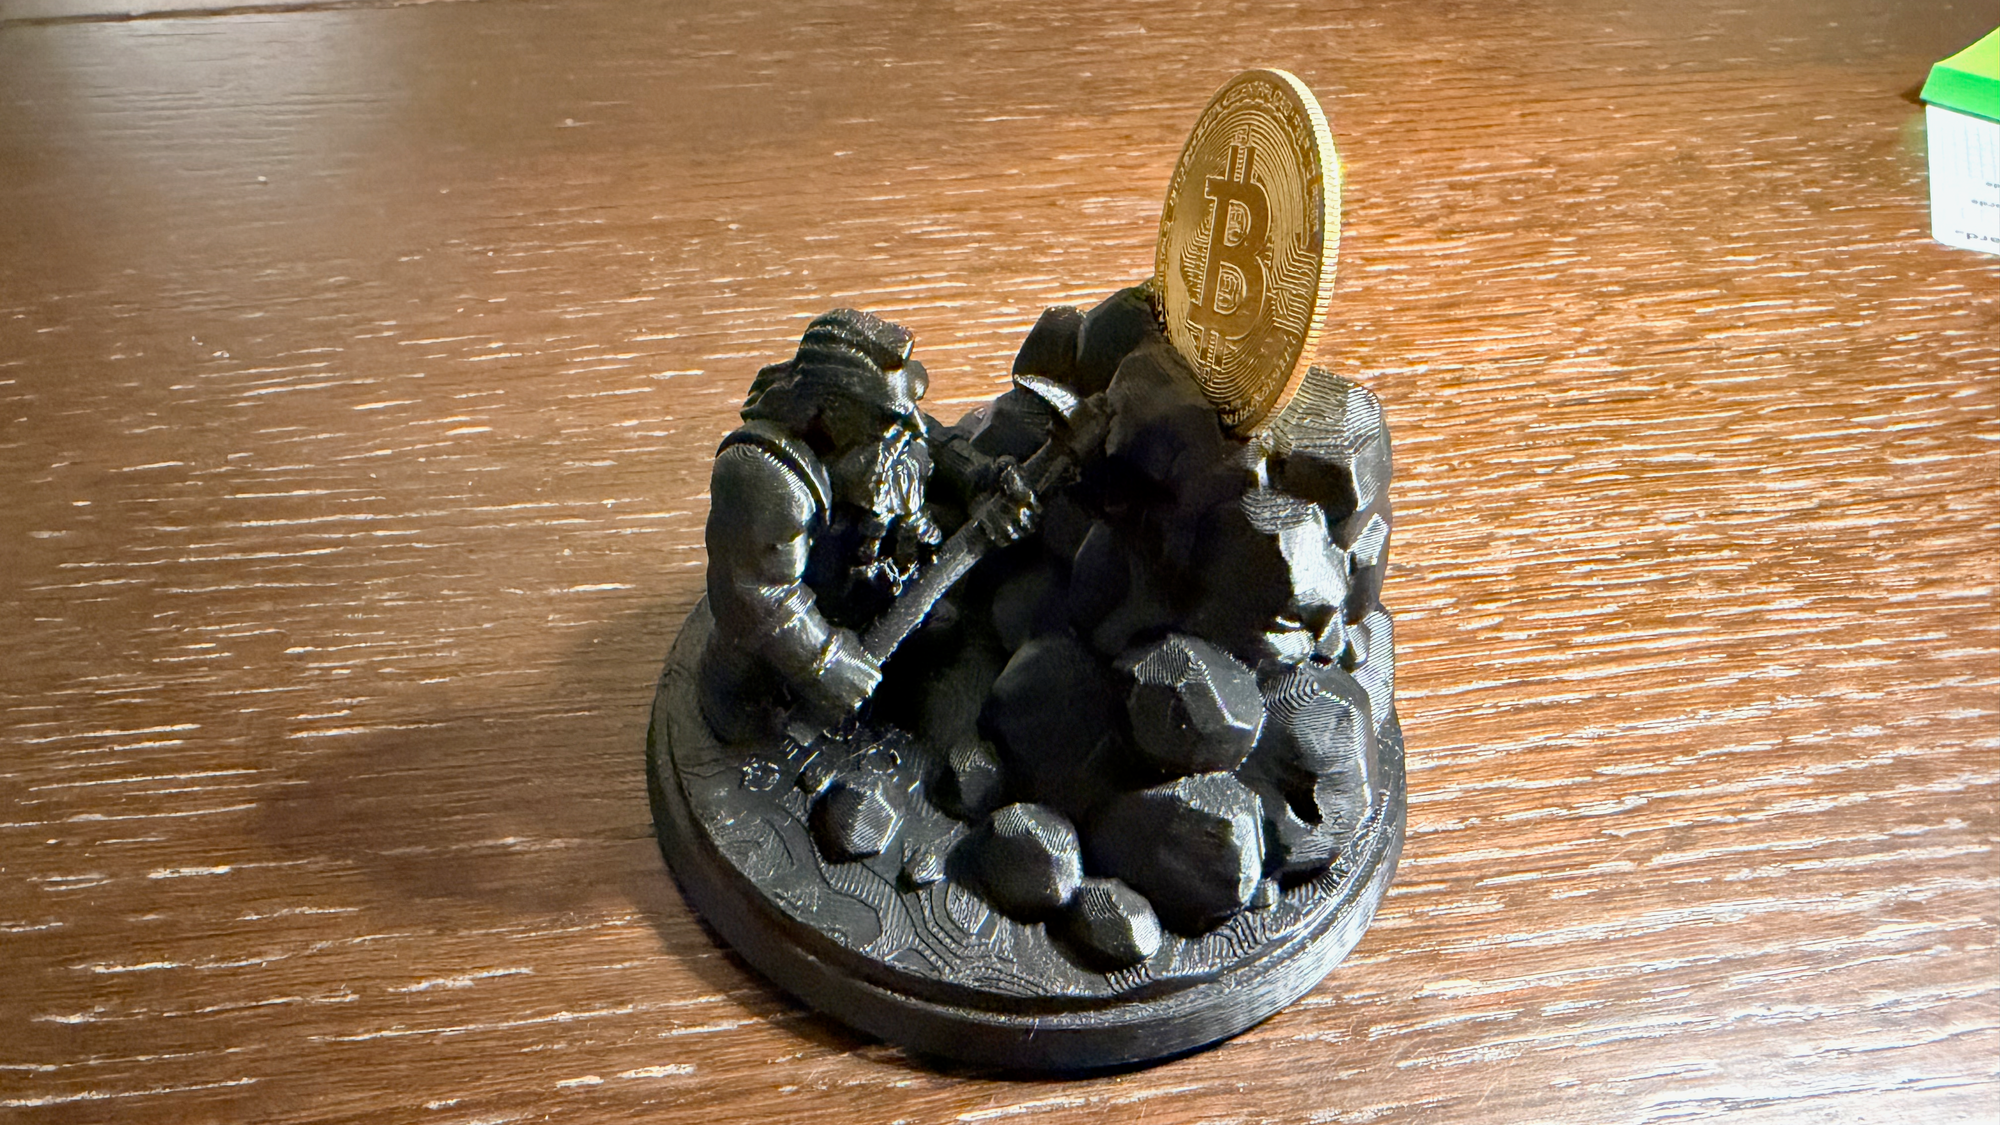
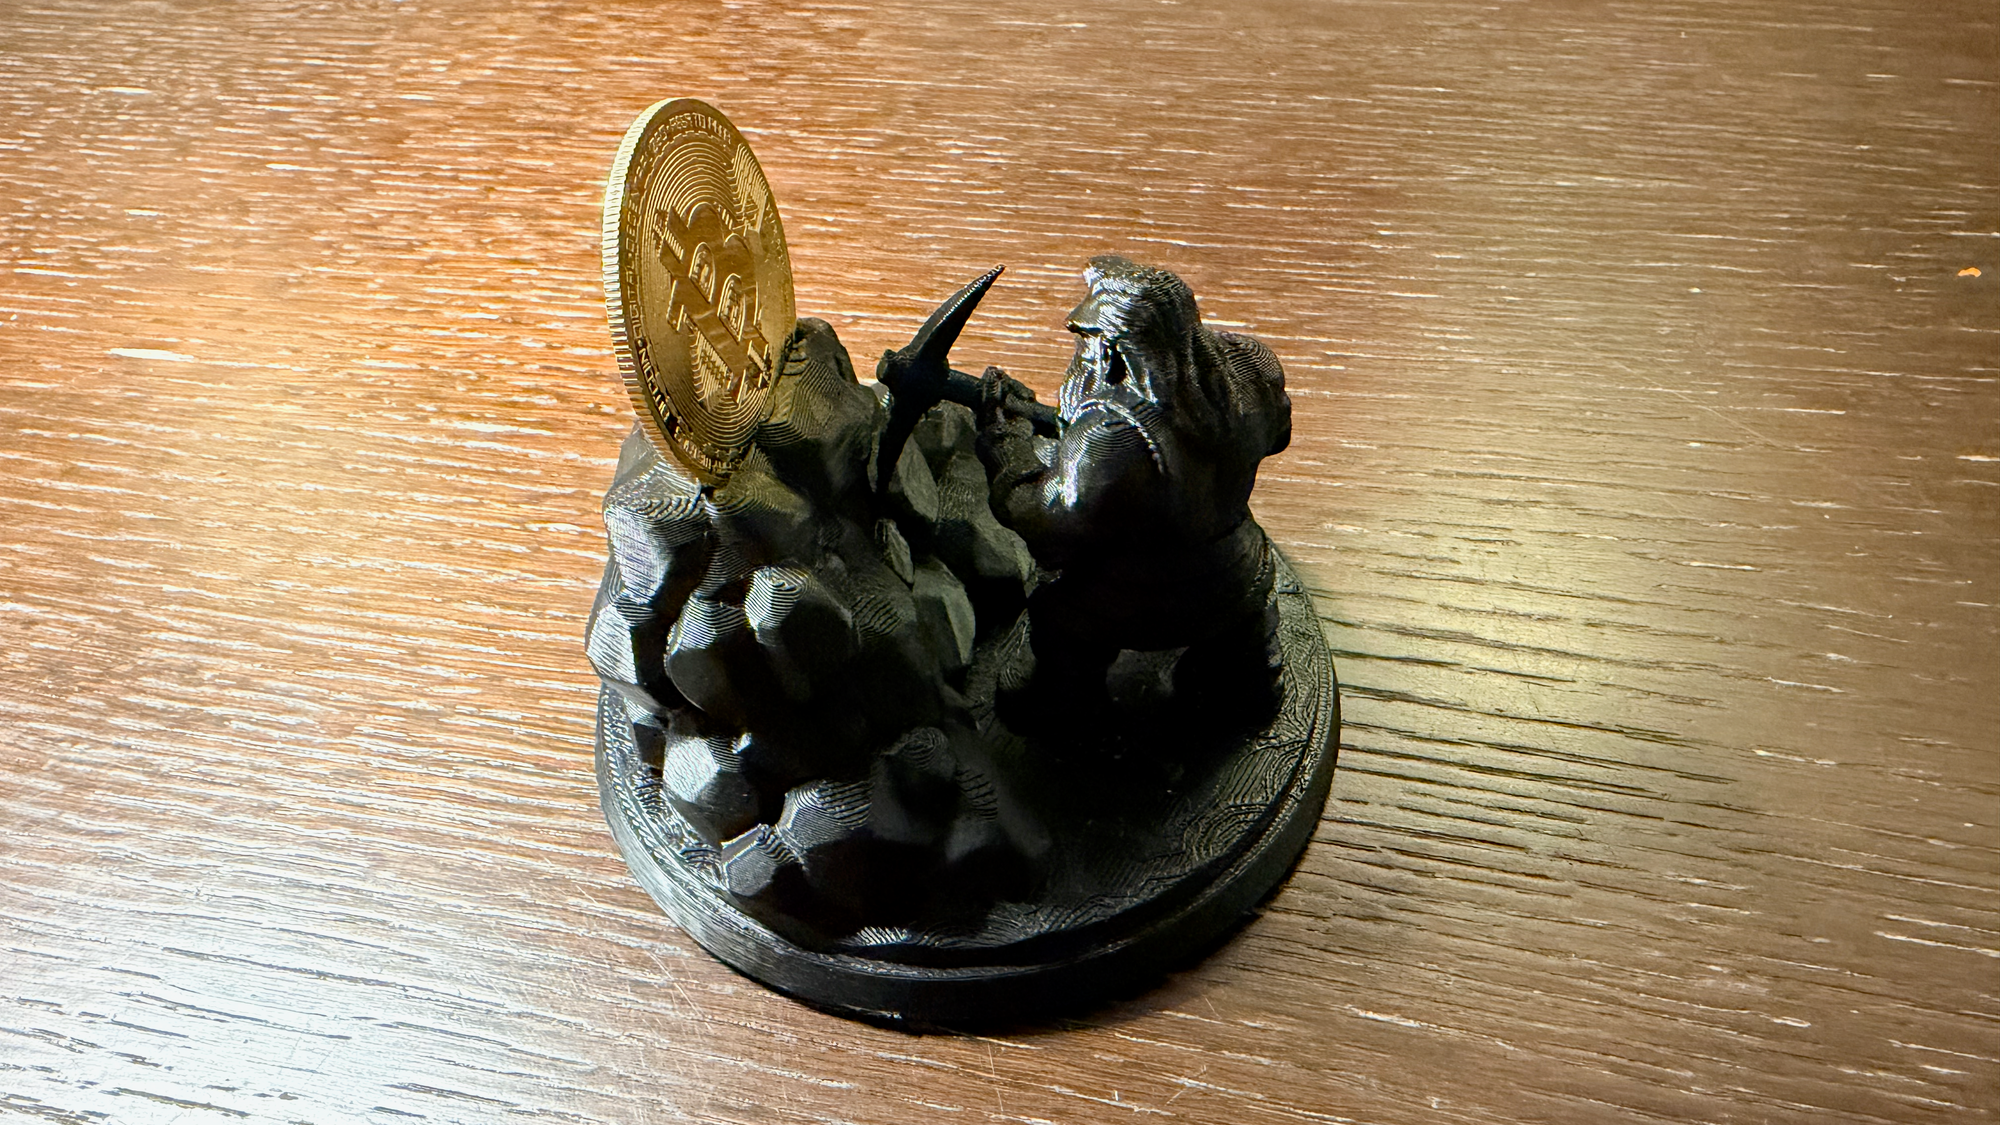
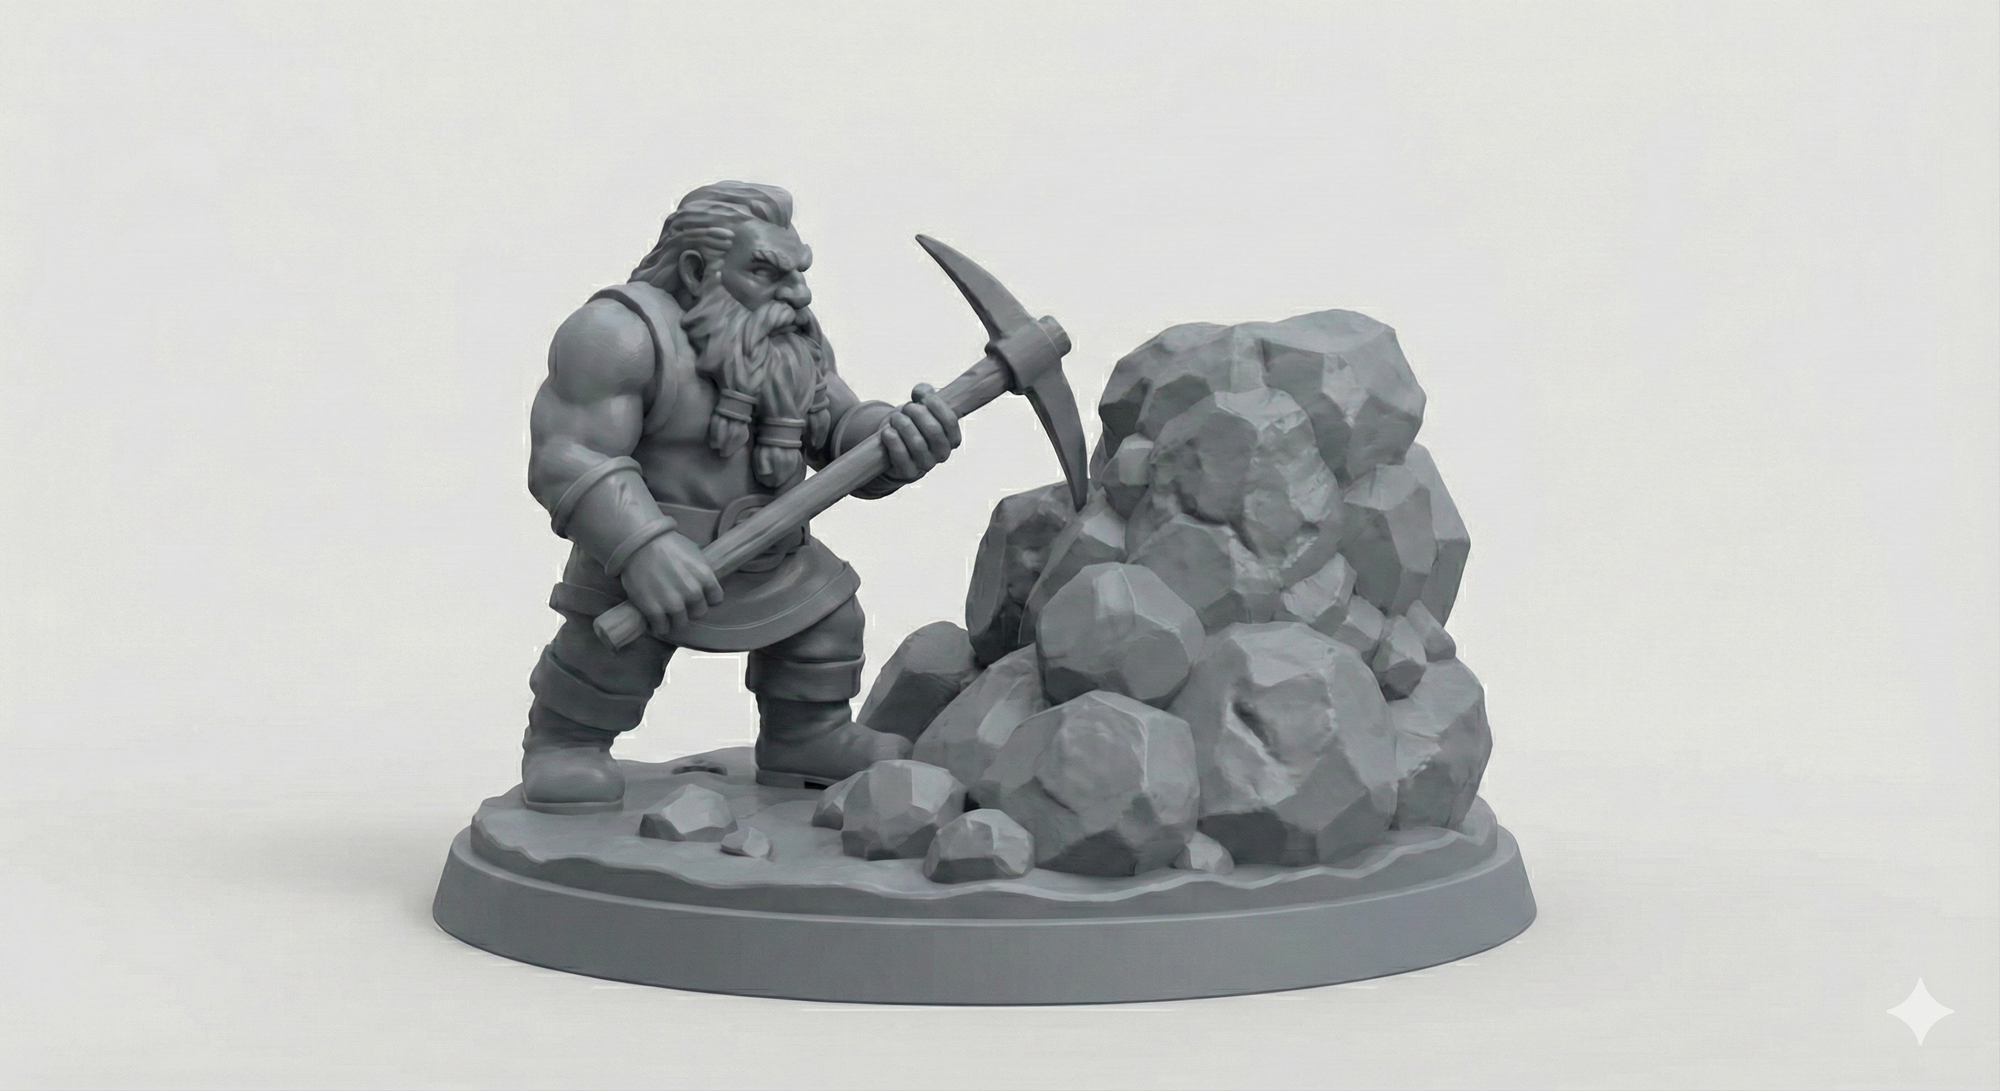
As a concrete example, I created a dwarf mining Bitcoin — complete with a custom cutout sized to fit the physical Bitcoin coin that shipped with one of my NerdQAxe++ miners.
The result: a high-quality physical object derived almost entirely from prompts.
1. Generating the Base Concept with Google Gemini
The process starts with Google Gemini and a carefully written prompt.
Prompting Strategy
The goal is not “art” but reconstructable geometry, so the prompt needs to be very explicit:
- A single subject
- No background clutter
- No dramatic lighting or depth-of-field
- Clear silhouette and surface detail
Example prompt:
Create a detailed 3D-style render of a dwarf mining Bitcoin.
The dwarf wears mining gear and holds a pickaxe, with Bitcoin symbols integrated into the design.
The model is centered, highly detailed, and shown against a plain, solid background.
Neutral lighting, no shadows, no environment.
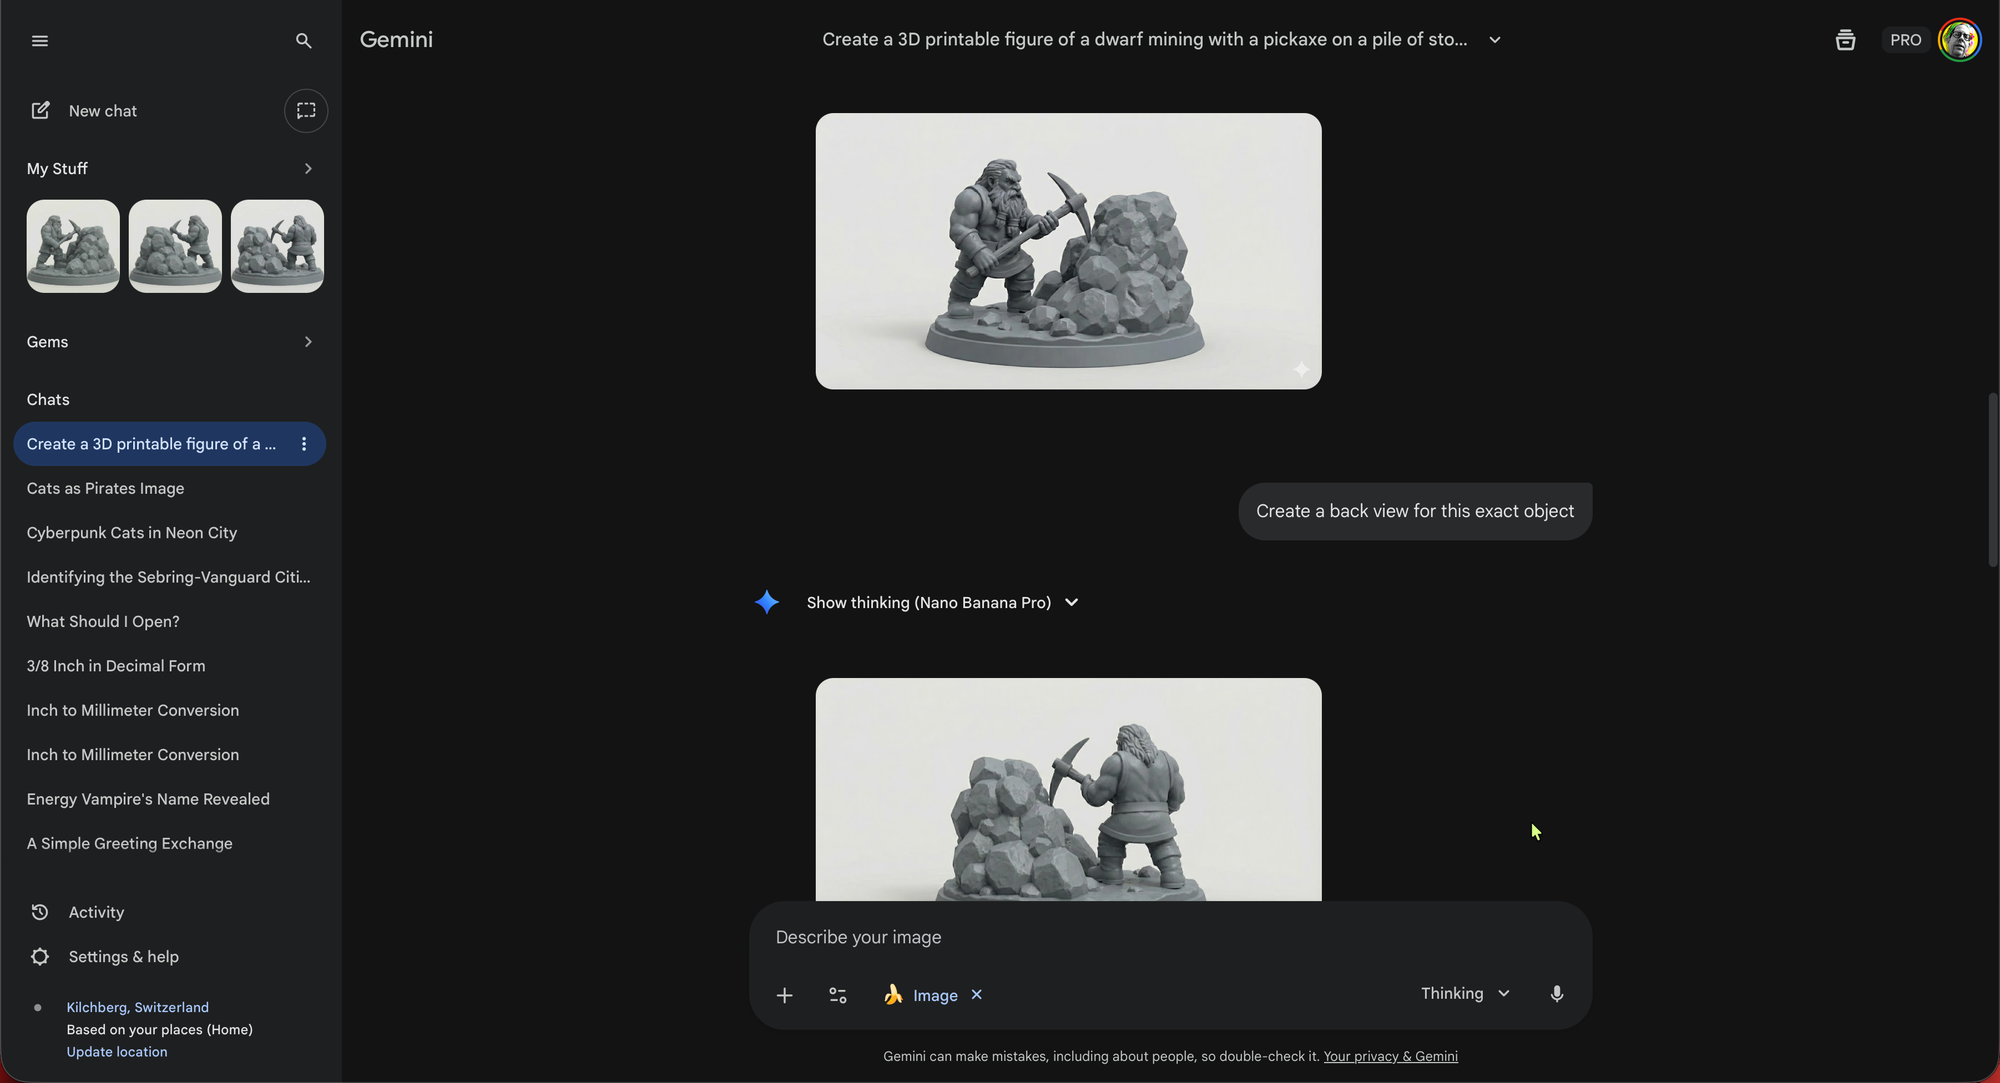
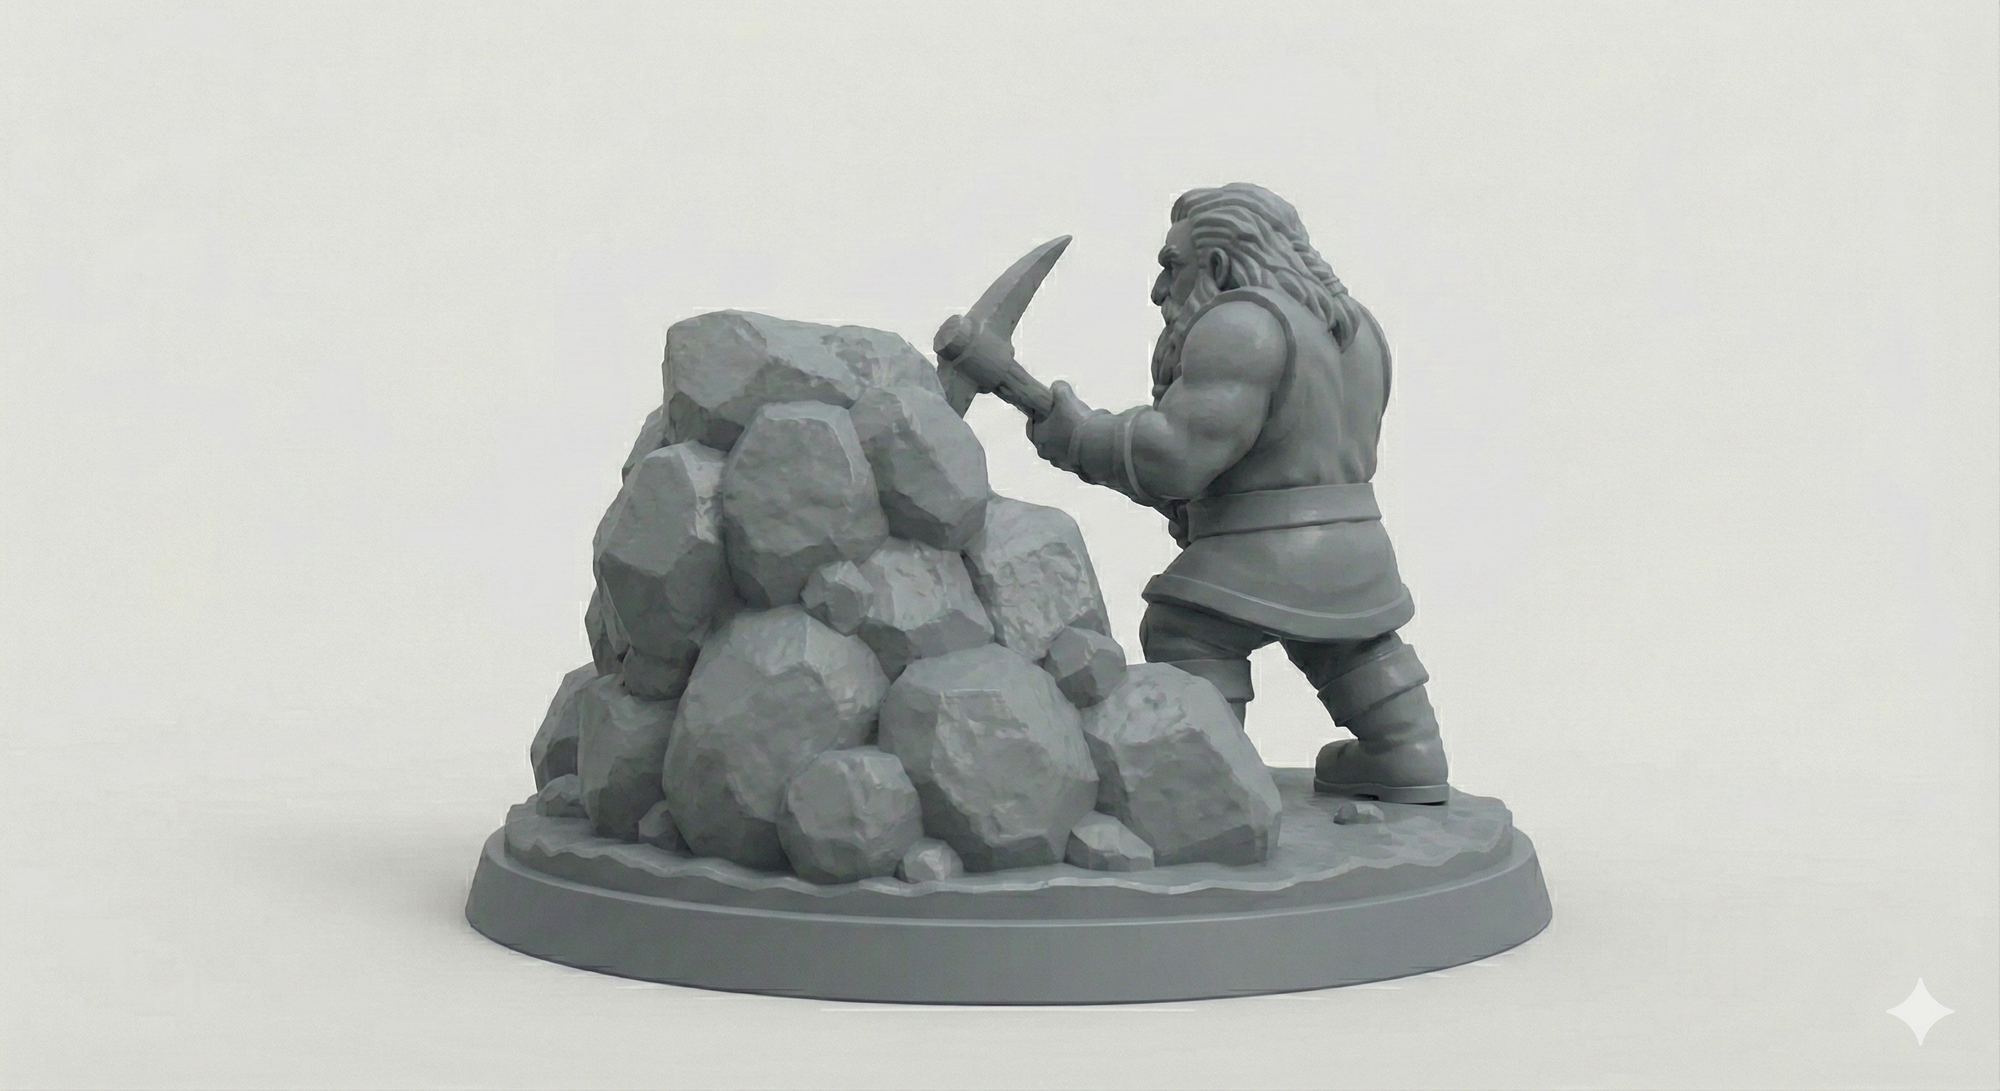
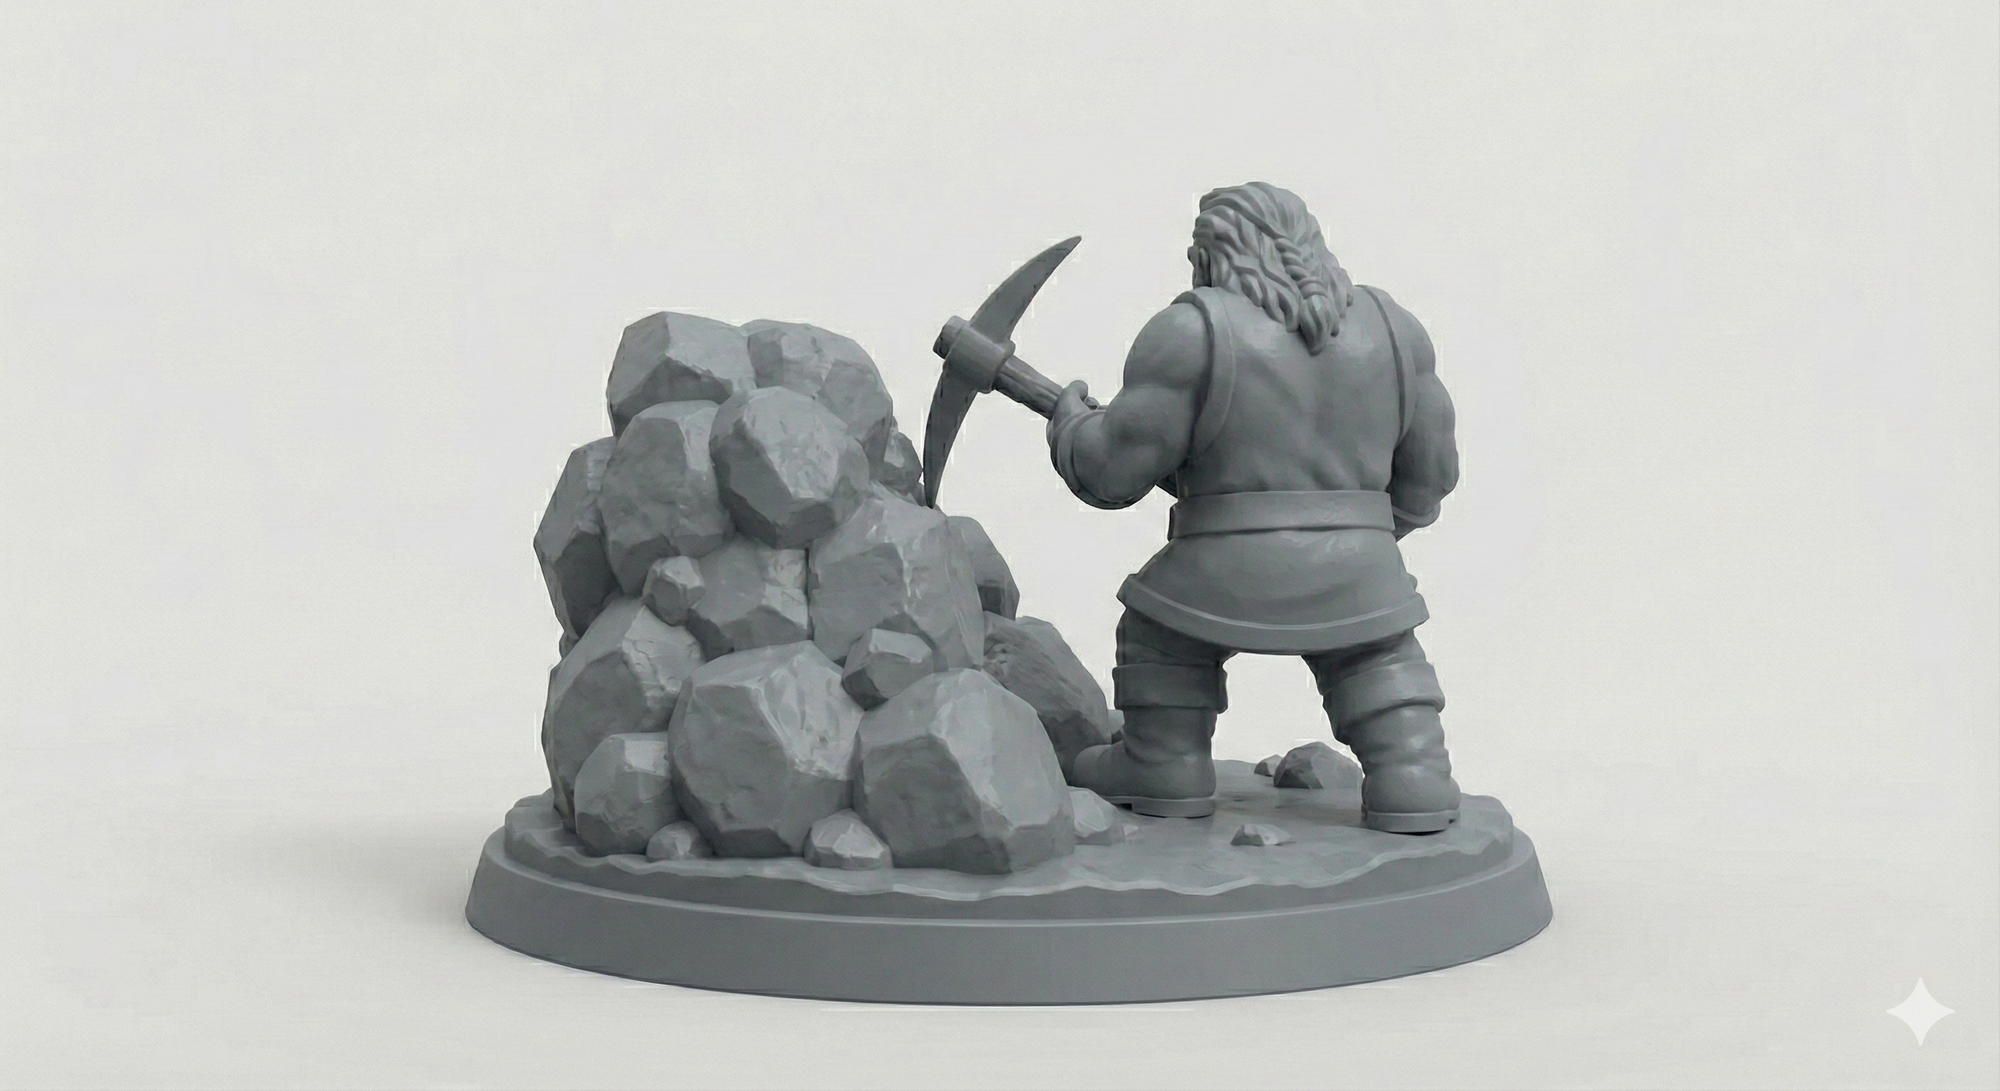
Once you have a good base image, ask Gemini to generate orthographic-like views:
- Front
- Back
- Left
- Right
- Optional top view
Each view should:
- Use the same scale
- Keep the same pose
- Remain on a plain background
These multiple perspectives are critical for accurate 3D reconstruction.
2. Reconstructing the 3D Model with hitem3d.ai
Next, I import the generated views into hitem3d.ai.
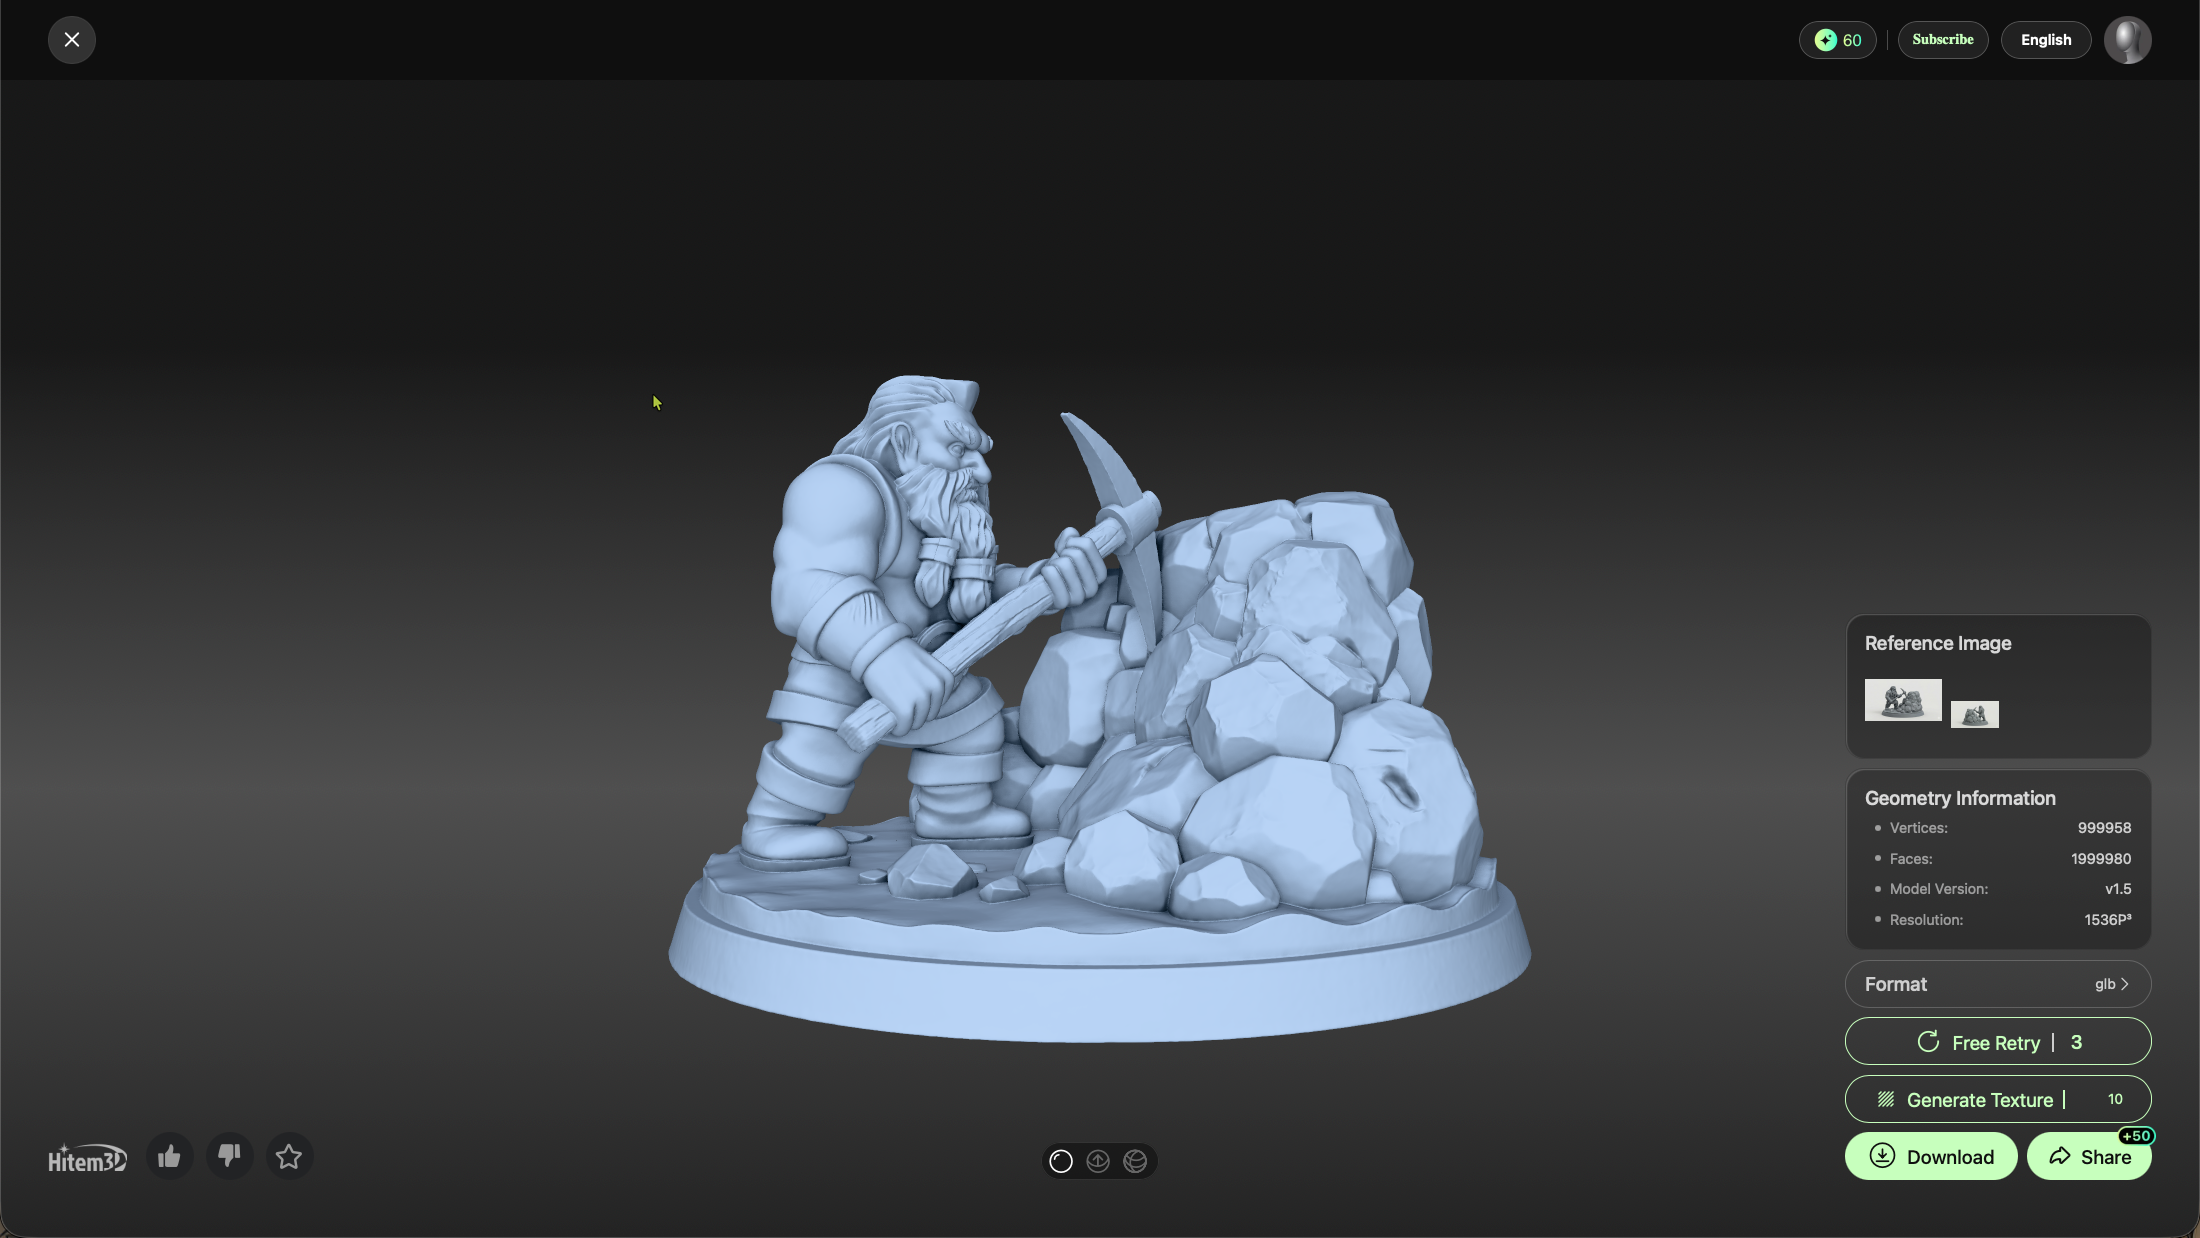
What hitem3d.ai Does Well
- Uses multiple 2D perspectives to reconstruct a volumetric model
- Preserves fine surface detail
- Produces exportable geometry (STL)
What to Expect
The resulting model is usually:
- Very high-poly
- Highly fragmented
- Composed of many intersecting meshes
- Not immediately printable
That’s normal. At this stage, fidelity matters more than printability.
Export the reconstructed object as STL.
3. Reducing Mesh Complexity in Bambu Studio
The next stop is Bambu Studio, the slicer for my Bambu Lab X1 Carbon.
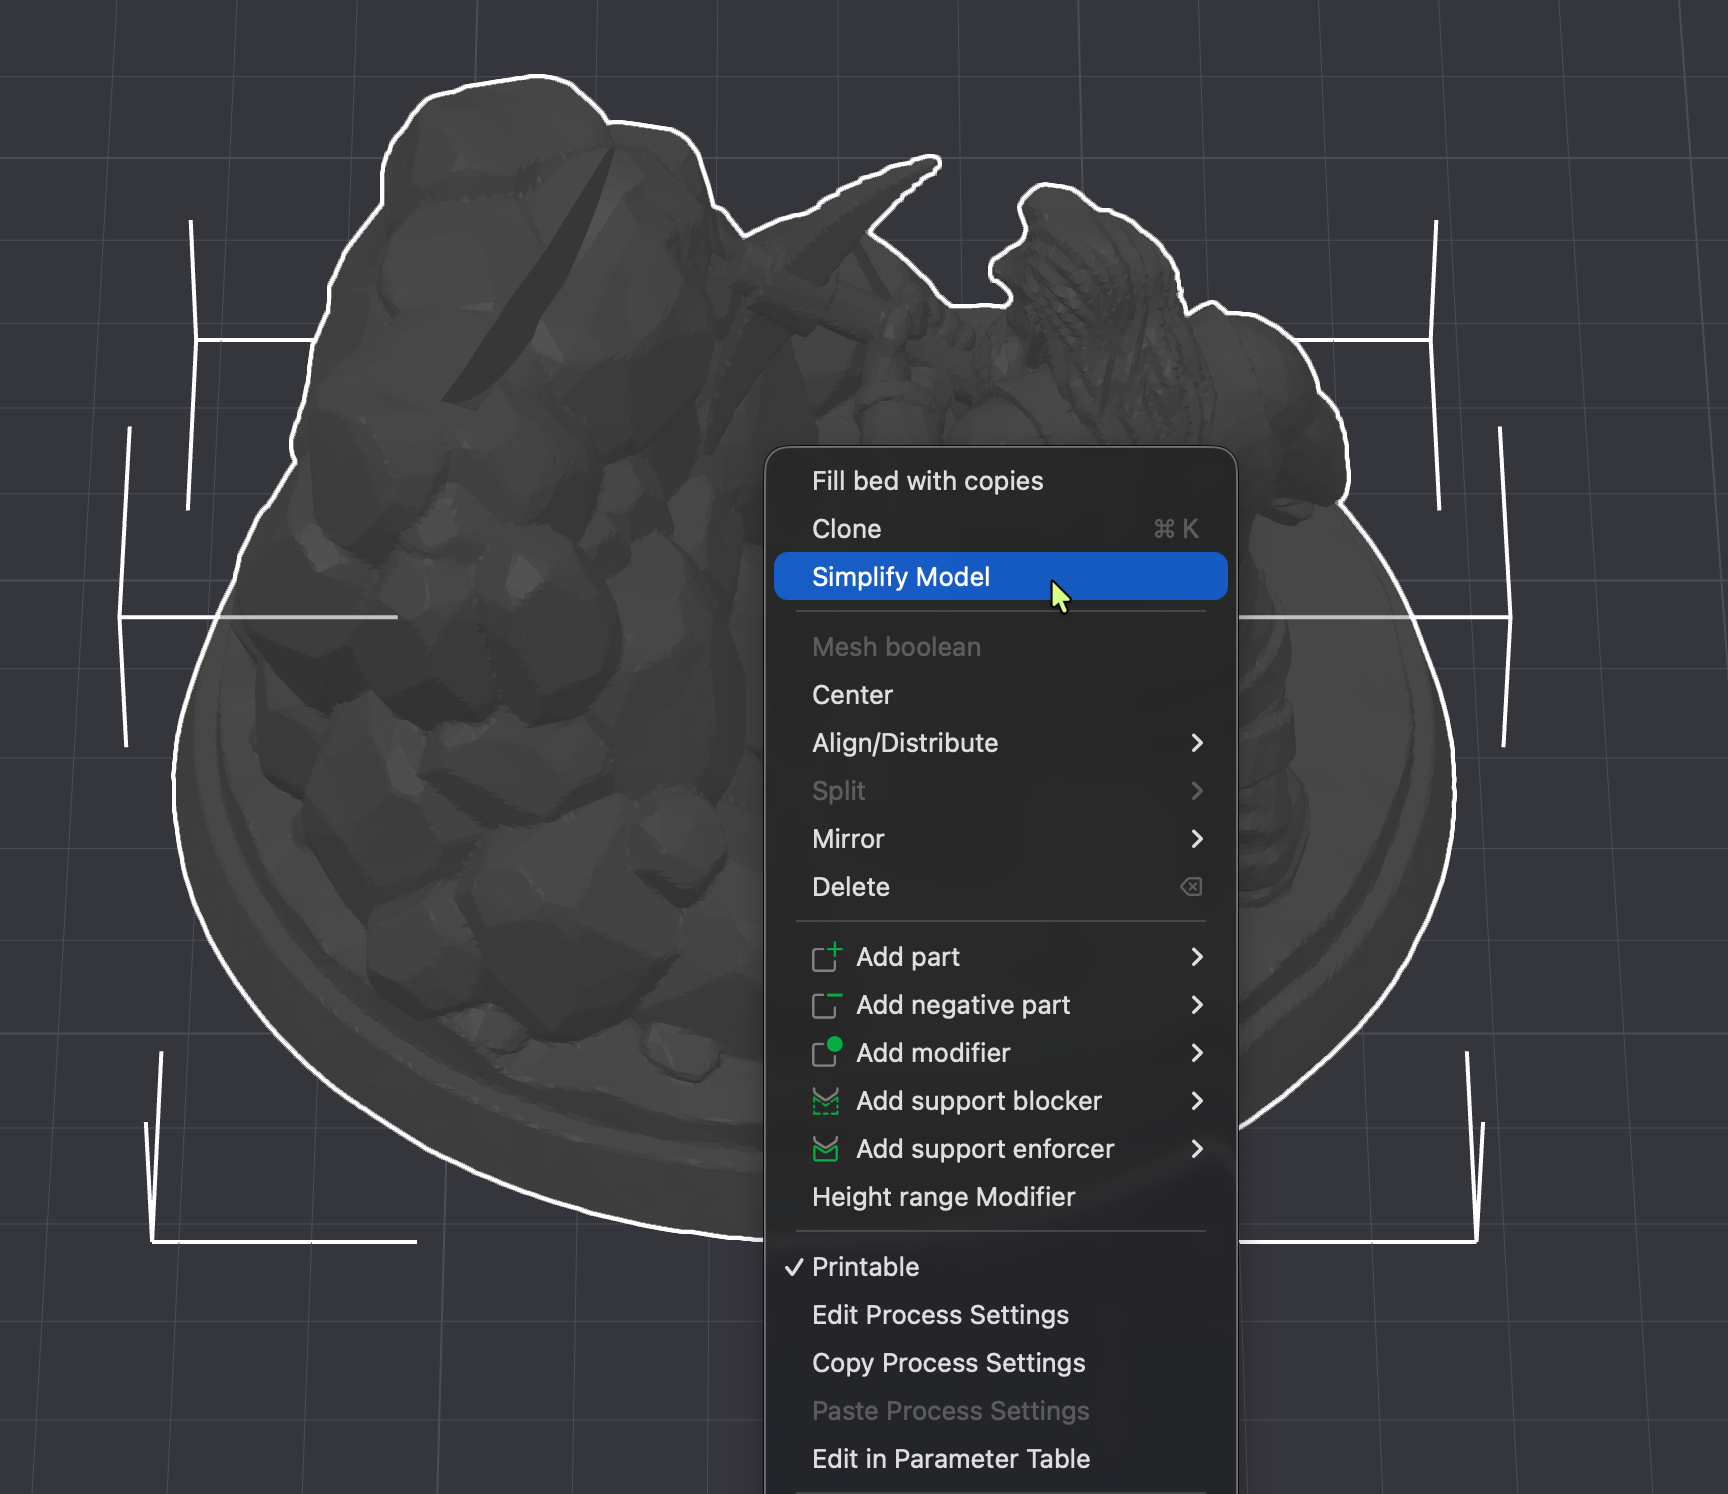
Although primarily a slicer, Bambu Studio is surprisingly useful for mesh simplification.
What I Do Here
- Import the STL
- Use mesh repair and simplification features
- Reduce excessive polygon count
- Merge obvious internal overlaps
The goal is not perfection, just:
- Fewer polygons
- Fewer disconnected parts
- A more manageable mesh
Export the simplified result again as STL.
4. Making the Model Watertight with MeshInspector
Now it’s time to properly fix the mesh.
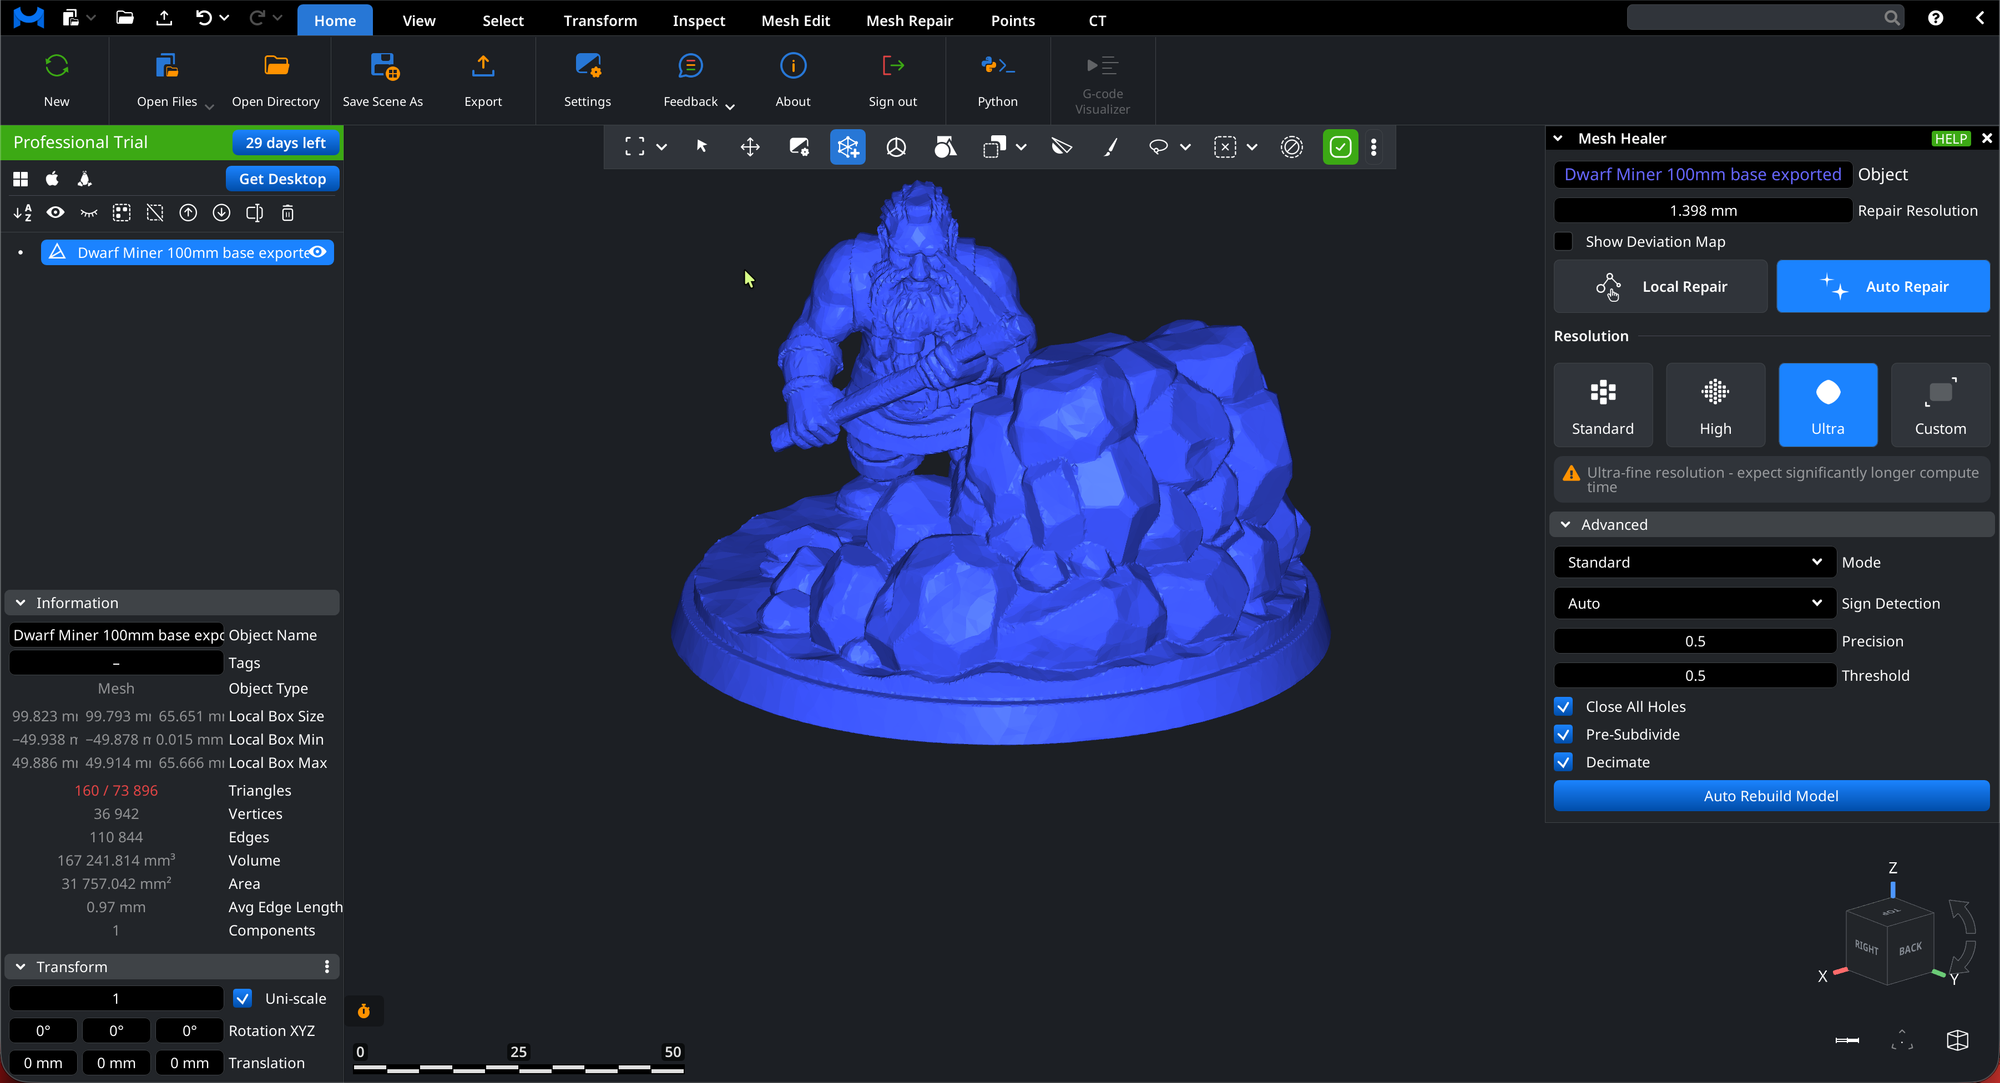
I upload the STL to app.meshinspector.com.
Fixes Applied
- Close holes
- Remove non-manifold edges
- Merge shells into a single watertight solid
- Eliminate internal geometry
- Ensure the mesh is printable
This step is crucial. Most AI-generated meshes fail basic print checks until they go through a tool like this.
Once complete, export a single-body STL.
5. Precision Edits in Shapr3D (or Your CAD Tool of Choice)
With a clean, watertight mesh, I move into Shapr3D for final design work.
In my case, I wanted something personal and functional.
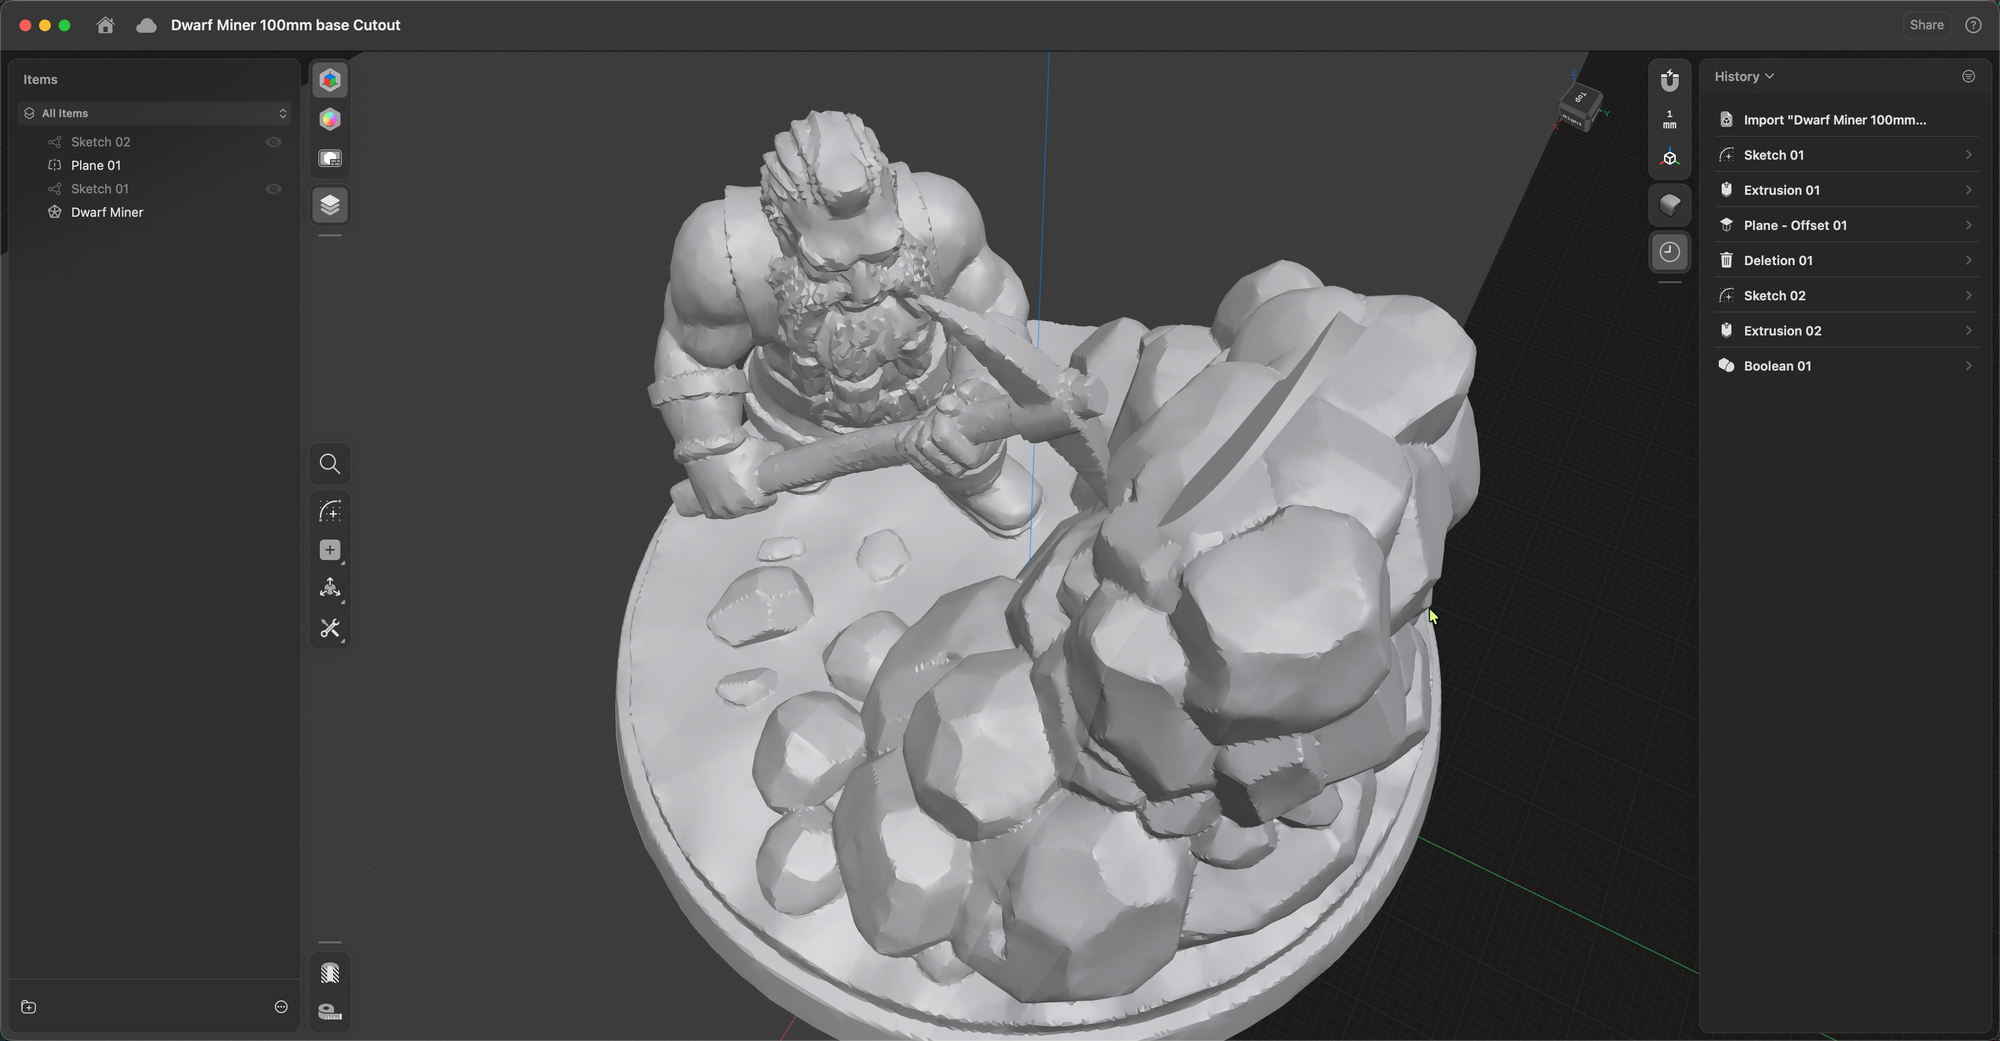
Custom Modification
I added:
- A precisely sized cutout
- Dimensioned to fit the physical Bitcoin coin that came with my NerdQAxe++ miner
- Clean edges and tolerances suitable for FDM printing
This is where traditional CAD still shines:
- Exact measurements
- Boolean operations
- Design intent
After the edit, I export the final STL.
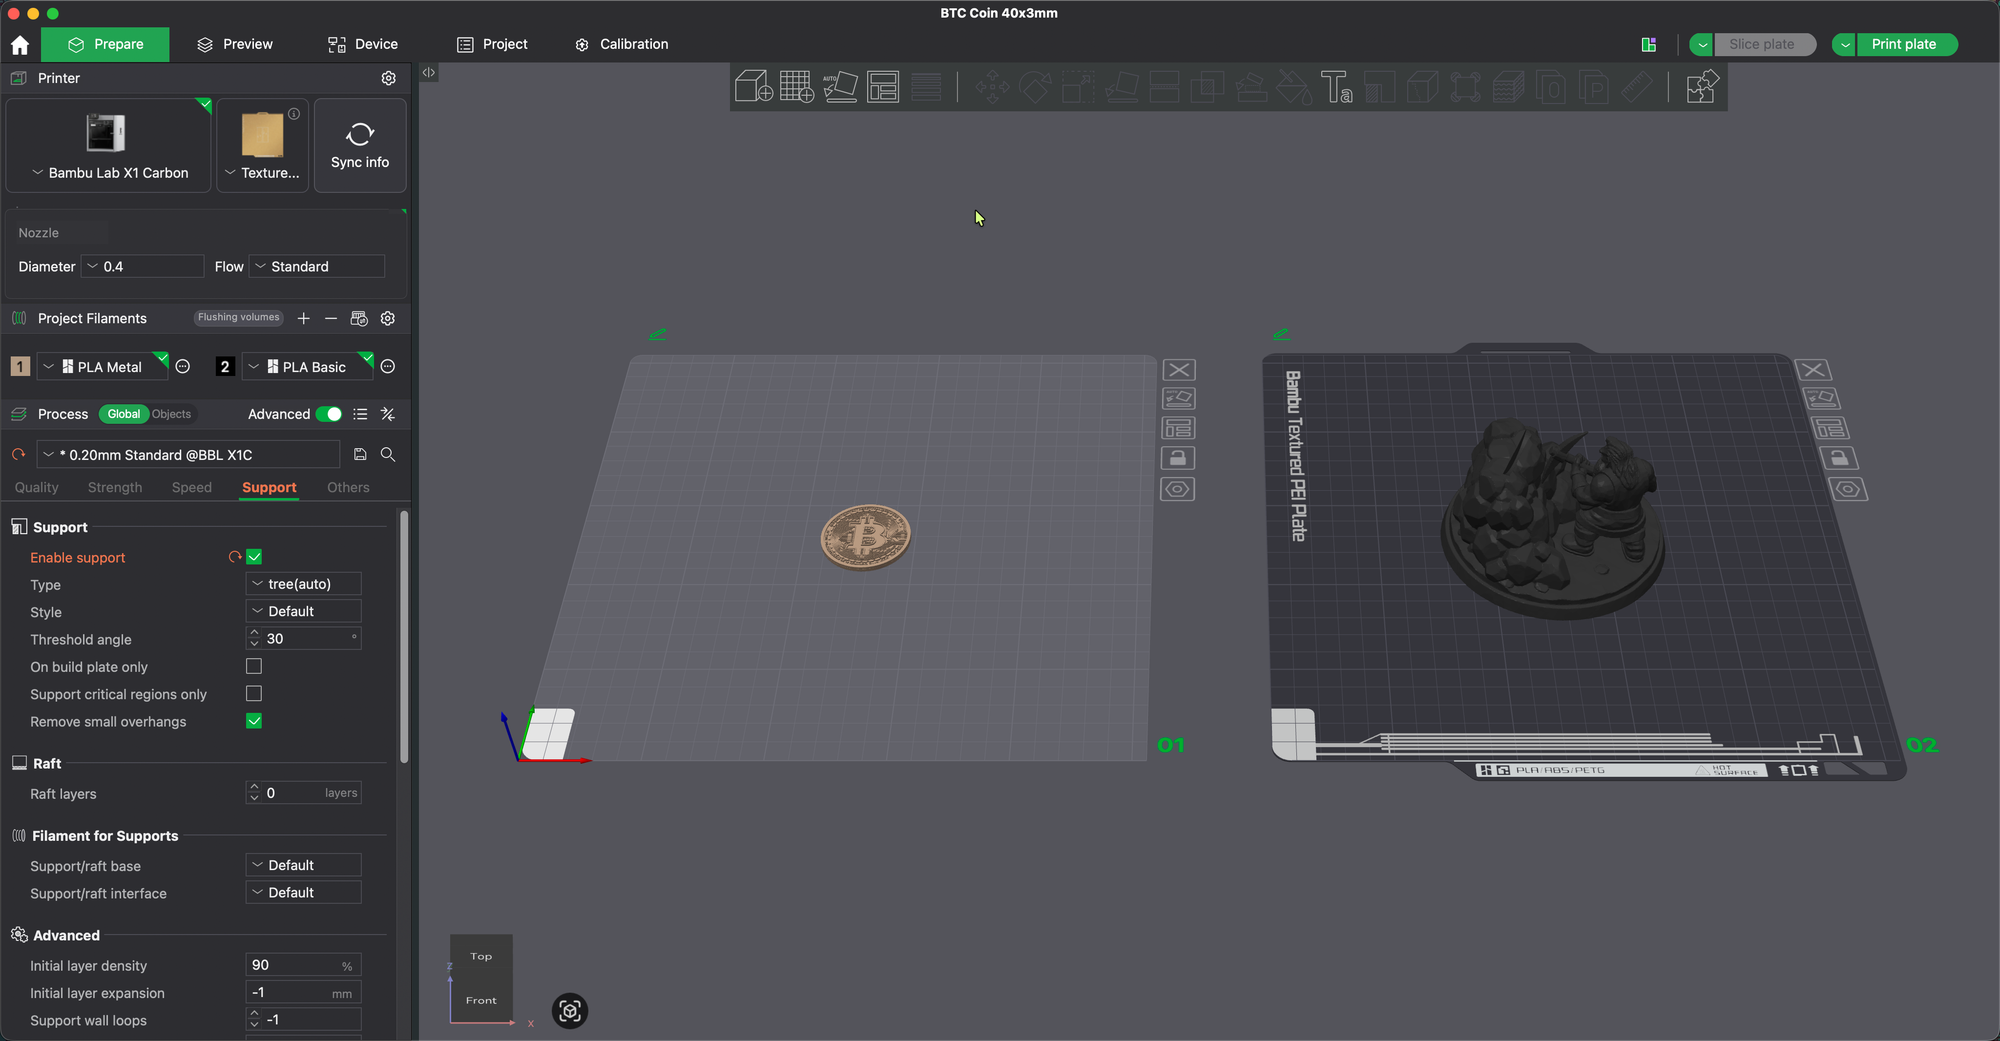
6. Final Slicing and Printing
The last step is back in Bambu Studio:
- Import final STL
- Choose material
- Orient the model
- Add supports
- Slice and print on the Bambu Lab X1 Carbon
The print comes out as a single, solid object with:
- High surface detail
- Proper mechanical tolerances
- A perfectly fitting coin slot
Final Thoughts
This workflow still feels a bit like magic:
- An idea
- A prompt
- A handful of AI and mesh tools
- A real, physical object in your hands
No sculpting from scratch. No manual polygon pushing. Just guided refinement from concept to print.
AI doesn’t replace traditional CAD — but it radically accelerates the creative phase. What used to take days of modeling now starts with a paragraph of text.
And the result?
A custom 3D model that exists because you imagined it.